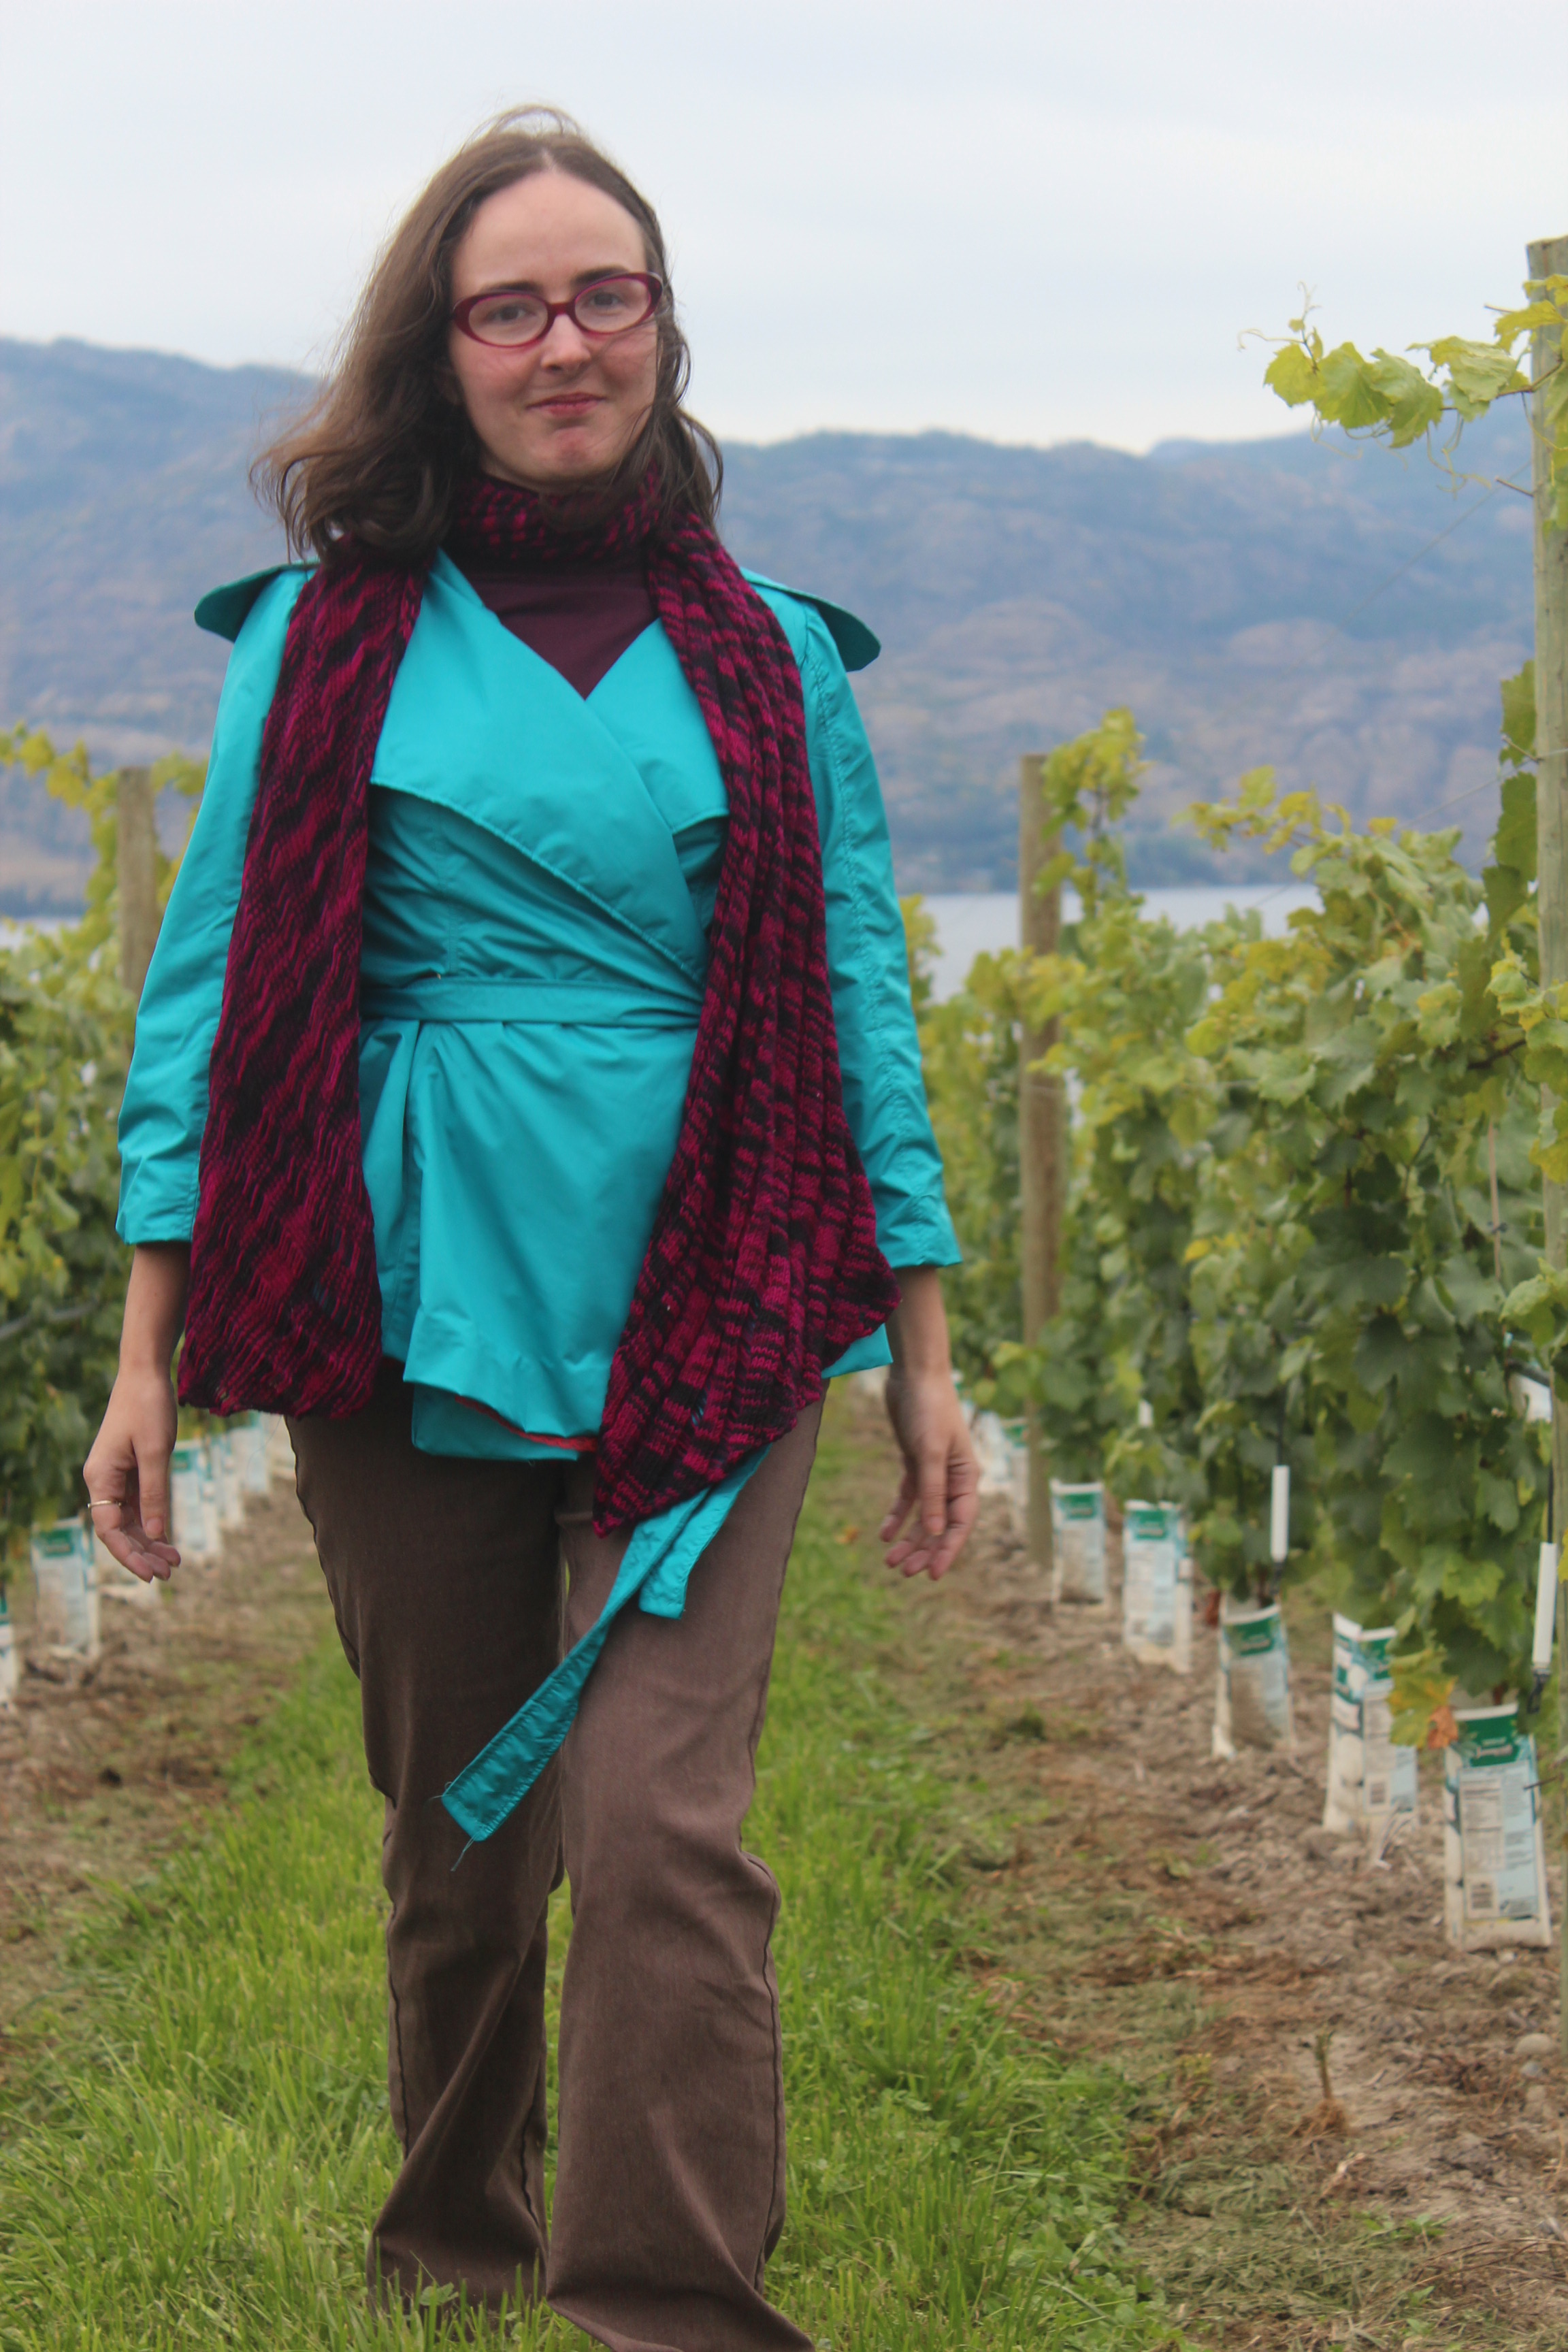
Completed: Sewaholic Thurlows

10 04 2016

I made pants!

IMG_4065

I am ridiculously excited about this. Pants intimidated me and sewing dresses with fun fabrics just seems more fun. But there is no denying that pants make up a big part of my work wardrobe and since I want to move towards having a mostly me made wardrobe I was going to need to learn how to sew them.

I often find that if I am intimidated by/scared of something the best approach is to just jump in and not think too much about being intimidated. So that’s what I did. I decided to use the Sewaholic Thurlow pattern partly because that’s a local pattern company (yay local) and also because Lauren at Lladybird did a great series of tutorials for a sewalong a few years ago and take a lot of mystery out of some of the trickier parts. Having those tutorials gave me the confidence to forge ahead.

So let’s talk fit. Choosing a size was a bit of a challenge. Sewaholic patterns are designed for pear-shaped figures and while I am wider in the hips than anywhere else, I am just not that curvy. My waist measurement put me at an 8 and my hips more like a 2. My first muslin was an 8 and boy oh boy, it was huge. Lauren mentioned going by the finished measurements so I went by that and chose a 4. That worked much better. In fact the only alteration I made before cutting was to shorten the legs by 1.5 inches. After the pants were completed I ended up taking in the center back seam about half an inch more.

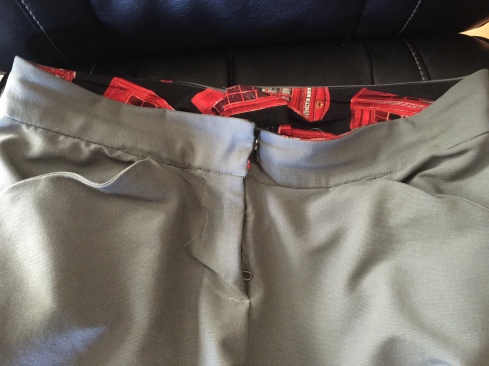
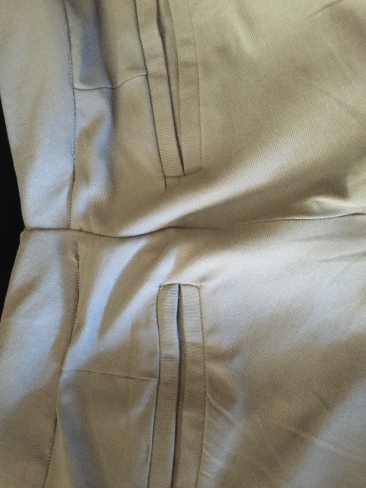
I quite enjoyed making these. The instructions are clear and if you are a total newbie to things like fly zippers and welt pockets, the sewalong tutorials are great and include a lot of pictures. The stretch suiting I chose ended up having A LOT more stretch than I expected so that was less than ideal (note, pay more attention to that in the future) but the pants came out better than I thought. I’m now going to take a break and sew some quick and easy stuff for a bit but I already have fabric for pair number 2.

IMG_4073IMG_4069


What projects have you been afraid to try? Go do them!


Mostly Magknitficent : Episode 19

15 10 2015

https://www.youtube.com/channel/UCUO7jYPejKPFMKn4r3I7paw

Shownotes:

Knitting Present:

Elsa Cardigan

Argyle Sweater

Sewing:

Hexagon Tree Skirt

Stitching

Frosted Pumpkin Very Merry Christmas Town and Story Time


Castle Quilt

12 07 2014

Untitled

I fell in love with the Sand Castles pattern the moment I saw it. At the time I’d only made one quilt but I impulsively bought the pattern and two different sets of fabrics to make it one day. It all sat in the stash awaiting the moment I was brave enough to attempt it.

In February we learned we were expecting another girl and I was struck with inspiration. I had fallen in love with the Once Upon a Time collection by Alexander Henry and decided I wanted to design the girls’ room around it. It was also the motivation to start the quilt.

It was definitely a challenge. I hit a road block early on when the castle turrets were not fitting properly on the towers. I ripped and resewed and remeasured the pieces several times before it occurred to me to make sure that the templates I had printed and cut from measured correctly. (spoiler: they didn’t). So I had to recut all those pieces. Luckily I am a chronic over buyer of craft supplies. Once I got a few blocks done though it was just a matter of doing the same thing again and again and I got pretty proficient. Eventually I was able to sew a block in about an hour.

Untitled

I don’t know why but I was expecting the quilt to be smaller. I say I don’t know why because it came out pretty close to the measurements listed on the pattern but I am apparently not very good at visualizing what measurements mean. So instead of being roughly a twin size quilt it’s more of a double. Not a bad thing certainly but it did make it more of a challenge to quilt.

This is only the second quilt I’ve made so I went simple with the quilting. I stitched in the ditch around each block and did diagonal lines over the whole quilt.

IMG_4272


What I’ve been working on

23 06 2014

It’s been awhile huh? Suffice it to say that the months that have passed since my last post and today have been eventful. Not long after my last post we learned we were expecting our second baby! Naturally this news really changed the course of my sewing and crafting over the next several months. Instead of sewing dresses and pants and coats for myself my attention turned to baby quilts and nursery decor. I was productive in my crafting throughout my pregnancy but spent very little time at the computer when not at work so I haven’t had a chance to post about any of it. I’m working on a collection of posts about the various projects I finished for baby that I will hopefully be able to post sooner rather than later. In the meantime, meet baby Isa.

IMG_4202


Mostly Magknitficent – Episode 15

4 06 2014

I share my latest finishes and works in progress.


Rainy Day Lady Grey

9 10 2013

Rainy Day Lady Grey


Image

Summer doesn’t offer a lot of guarantees here in Vancouver. The weather does get warmer and it rains less but the key there is often the less. Some summers are pretty crappy. This summer though was glorious. Record breaking dryspell and perfect temperatures. It was the kind of summer that tricks you into thinking fall isn’t around the corner.

Fall has indeed arrived here on the wet coast, or, as I have taken to calling it, the season of greyscale. You see around here, once the grey skies and rainy days show up, they may not go away again for many months. This is why this time of year I need colour more than ever. I will never understand why the default colours for rainy day wear are black, grey, brown and taupe. Nope. I need colour to help me through the grey season. Last spring I was on the hunt for a colourful raincoat that was also a little more formal than my utilitarian Stormtech, something I could put on over a dress for going out dinner and such. Not that I do that much but I find there are big gaps in my wardrobe for more formal outerwear. Anyway, I did find one in the perfect shade of light teal/dark turquoise but it was a/ more than I really wanted to spend and b/ not quite the style I was after. I didn’t buy it but regretted it a week later. I tried to go back and find it but either I was misremembering the store I saw it in or, thanks to fast fashion, it was already gone. Boo.

Never fear! This is why I learned to sew. So I could make the things I couldn’t find in stores. I scoured the Internet for fabric and came out with some nylon raincoating in just the colour I was searching for along with some rayon challis print for the lining. I settled on the Lady Grey pattern from Colette. It’s a striking shape and I actually like that it doesn’t have a hood. Something about hoods always makes things feel more casual to me. This will be the rain coat I wear while carrying a snazzy umbrella or wearing an awesome hat.

I originally started this back in early June, made a few muslins and got the fit sorted out but then I had a couple of deadline projects to complete. Besides, who wants to sew a rain coat in the summer? That’s like admitting that the warm weather won’t last! I picked the project back up in August. It went pretty smoothly, even though it is labeled “advanced” and I am much more of a novice. The instructions are very clear and between those and Gertie’s sew-along posts from a few years ago I was able to figure out what I needed to do.

Image

I did not do any of the tailoring Gertie did in the sew-along. I was going to but my fabric is really too thin for that. I sewed the coat as written, including the top stitching and used fusible interfacing. I’ll save the tailoring for a heavier coat. I did have some trouble setting in the sleeves. No matter what I did I could not get them eased in without gathers. I think it might be the fabric I used. It really has no give to it at all. So I gathered them on purpose. Still not my finest job of sleeves but luckily the big collar and lapels help hide minor issues.

I did have some trouble with the hem. That was my own fault. I didn’t really understand how to gather the hem to account for the difference in width. I ended up ripping out my first attempt but then I found the Gertie video on the subject and that made a huge difference. 

Image

Overall I’m really proud of myself with this project. I definitely learned a lot and I’m really glad I decided

to take on the challenge.


Mostly Magknitficent Episode 8

1 10 2013

Knitting Past

Playful Stripes Cardigan by Alana Dakos out of Simplicity Hikoo

Knitting Present

Rose of England by Marianne Kinzel from The Second Book of Modern Lace Knitting (now available for the kindle!)

Self-designed sweater out of Wollmeise DK in Mauseschwanzen

Freshly Pressed

Sorbetto by Colette Patterns

On the Machine

Lady Grey Coat by Colette Patterns

Red Queen Costume using Simplicity 2065

Other Stuff

Lego Cake Tutorial Here

Gumpaste Lego Ninja Tutorial Here


Mostly Magknitficent Episode 7

25 08 2013


Knitting Present:

Rose of England by Marianne Kinzel

Playful Stripes Cardigan by Alana Dakos

Swatching:

Madeline Tosh DK in Tart

Plucky Primo Worsted in Hotsy Totsy

Studio Donegal Soft Donegal 

Argyle in Berrocco Vintage DK

Spinning

Hello Yarn Mochi

Freshly Pressed

McCall’s 7228 vintage dress

FIrst quilt, using Robotic from Birch Fabrics.

Now available on Itunes! Search for Mostly Magknitficent


Raspberry Sorbetto

9 08 2013

Image

As often happens when I finish a big project, especially a big project with a deadline, after finishing the dress and the quilt I wanted a quick project. Enter the Sorbetto tank by Colette. This is a free downloadable pattern which was perfect for an instant gratification project. I printed and assembled the pattern one evening before bed so that it would be ready to use on the weekend.

I had some pink poly-satin in mind for the top, something inexpensive and easy-care. I viewed this project as a kind of wearable muslin. I intend to make more of these, perhaps several in a variety of colours. The basic shell is a good wardrobe staple. Once my daughter went down for her nap on Monday (a holiday in most parts of Canada) I got to work.

Image

There are only two pieces so cutting was easy. When I sat down to sew I realized I didn’t have any pink thread. I didn’t really want to take time out of sewing to go to the store so I used white instead. The assembly was pretty quick and in no time I’d sewn the pleat, darts and side and shoulder seams. I was too lazy to make my own bias binding and I didn’t have anything that matched so again, I went with white. Did I mention that I was after a low-effort project? I’m not sure I love the contrast between the pink and the white, especially since the binding is matte and the satin is shiny but it’s okay. By the end of nap all that remained was the hem, which had to wait until I could get some pink thread.

White thread was all well and good on the inside but wasn’t going to work for the hem. I picked up some pink at the fabric store near my office on Tuesday so I could finish.

I finished it up yesterday. I’m pretty pleased though it’s definitely more of a wearable muslin. I’ll get some use out of it but I think a couple of changes will make it a better garment. For the next one I’ll change the position and length of the darts. In hindsight I should have thought to do this before since the pattern is drafted for a C cup and I am more of a B and I’ve never not had to move bust darts. I initially thought I might want to add some length. For some reason, even though I have a short torso I always feel like tops are too short. I suspect this is a product of always wearing rtw stuff that is too long. I wore this to work the day after I finished it though and I didn’t find myself tugging at it or feeling like it was too short.

All in all, the project really fit the bill of something I could whip up in a short period of time before moving on to my next big project.


First Quilt!

9 08 2013

I just finished taking a Beginner Quilting class at Spool of Thread. The class was one of my eventual goals


Image

When I took my first introductory class there over a year ago so I was excited to finally be able to take it. The timing worked out nicely too because the class ran over four evenings in July and I wanted to make a quilt for a baby due in August.

Image

It was a fun class, in no small part because it’s fun to spend a few hours sewing with other people. That’s one thing knitting has over sewing. I often make knitting into a social activity and it’s harder to do that with sewing. It was really fun to see all the different fabric combinations people chose.

Image

The pattern uses strip piecing to assemble the top and then sashing is added. I found the cutting to be the most intimidating part because it’s so final. You can’t just undo cutting. That part took me longer than it did some people because I was very very nervous about making a mistake.

After the top was assembled and the borders attached it was time for quilting! Yay. I can’t be the only newbie quilter to be sort of surprised by how much work is left after the quilt top is finished. Once my top was done it felt like the finish was so close. Haha! Nope. We used the stitch in the ditch method for the quilting. I have to admit my stitching is only in the ditch-ish. I had a difficult time combining accuracy with even stitches. I’m sure that will come with practice.

Image

Sewing the binding was the last class. I don’t know about others but I actually quite enjoy handstitching. I find it quite meditative and I like that I can do it anywhere (why yes I was the strange girl hand-sewing binding to a quilt on the bus).

I finished it all up at knitting this week and while it is full of mistakes I’m still proud of it. I used fabrics from the Robotic Collection from Birch Fabrics. I chose these fabrics because I wanted something fun and playful but not baby-ish. Since the quilt is larger than your typical baby quilt I didn’t want fabrics that screamed baby in order to give it some longevity. I also didn’t want it to be too obviously intended for a boy because a/ I have a bit of hostility towards the tendency to colour code little children and b/ I wanted to make it more versatile. These fabrics were also an homage to the notyet-born’s parents who are an engineer and a scientist. The borders and sashing are a yellow Kona.

Image

I’m already thinking about my next quilt but I’ve got some other projects planned that I should tackle first.